A version of this post was originally published on my agency’s blog, Brandetize.
All too often marketers get caught creating one-off campaigns without any plan in place. By doing this you’re putting all your eggs in one basket, you’re giving the campaign a lower chance of success, and it isn’t scalable.
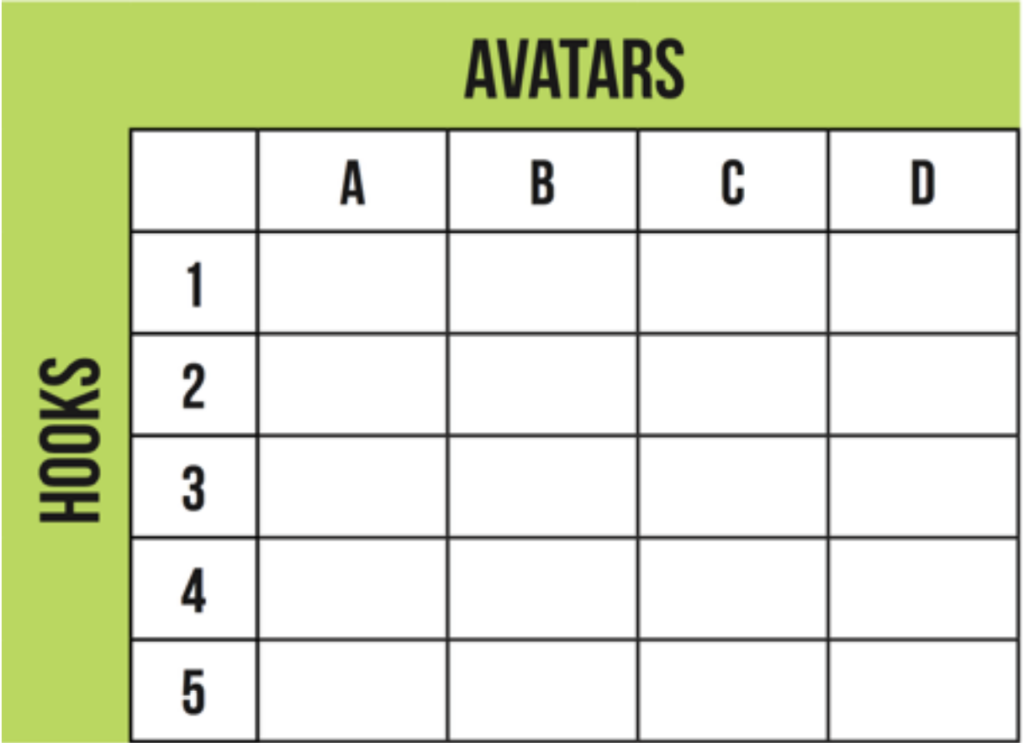
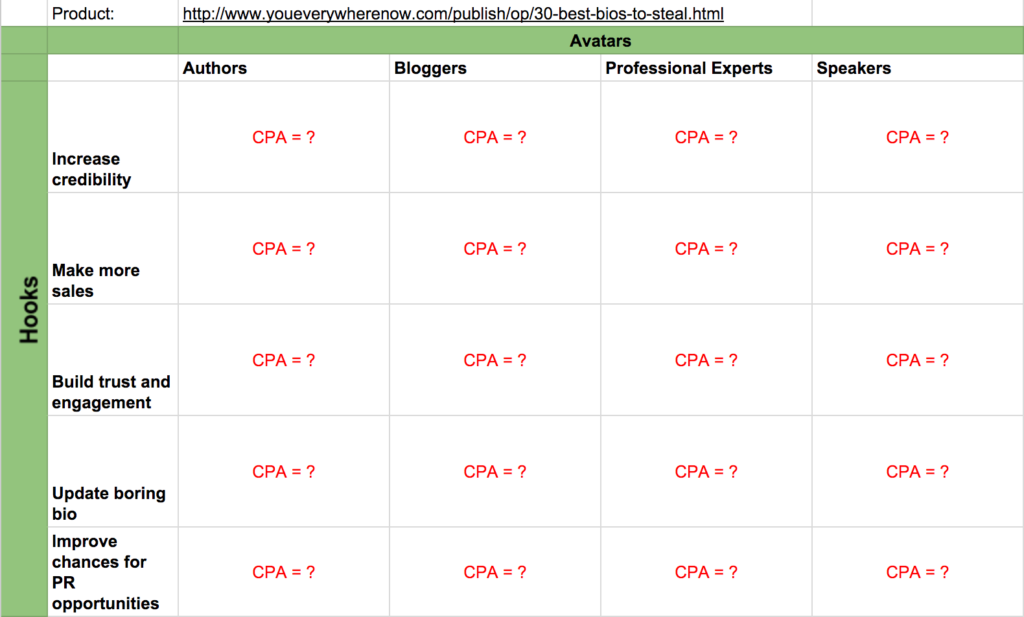
The Ad Grid is a concept developed by Digital Marketer to combat this problem. The Ad Grid is great for testing and scaling Facebook campaigns or campaigns on any other platform. It’s a repeatable process that can be used as a way to systemize ad creation.
It looks like this:
I’m going to use the example of the lead magnet Top 30 Stellar Author Biographies for Inspiration to go step by step through the process.
Step 1: Identify the Avatars
What are the different types of people who could use or benefit from the offer? Remember, this is all about testing, so you don’t have to be 100% accurate about these.
I asked myself, “Who would find value from having a compelling biography?” I came up with:
- Authors – people who have already written a book is an obvious place to start
- Bloggers – other writers who might not have a book
- Professional Experts – people who need to show their expertise and could write a book
- Speakers – very similar to authors in that they have a message to share
Put the avatars in the x-axis of your grid.
Step 2: Identify the Hooks
How will your avatars benefit from your offer? What will they accomplish or where will they be that is different from where they were before your offer?
I identified these hooks for our biography lead magnet:
- Increase credibility
- Make more sales
- Build trust and engagement
- Update boring bios
- Improve chances for PR opportunities
Put the hooks in the y-axis of your grid.
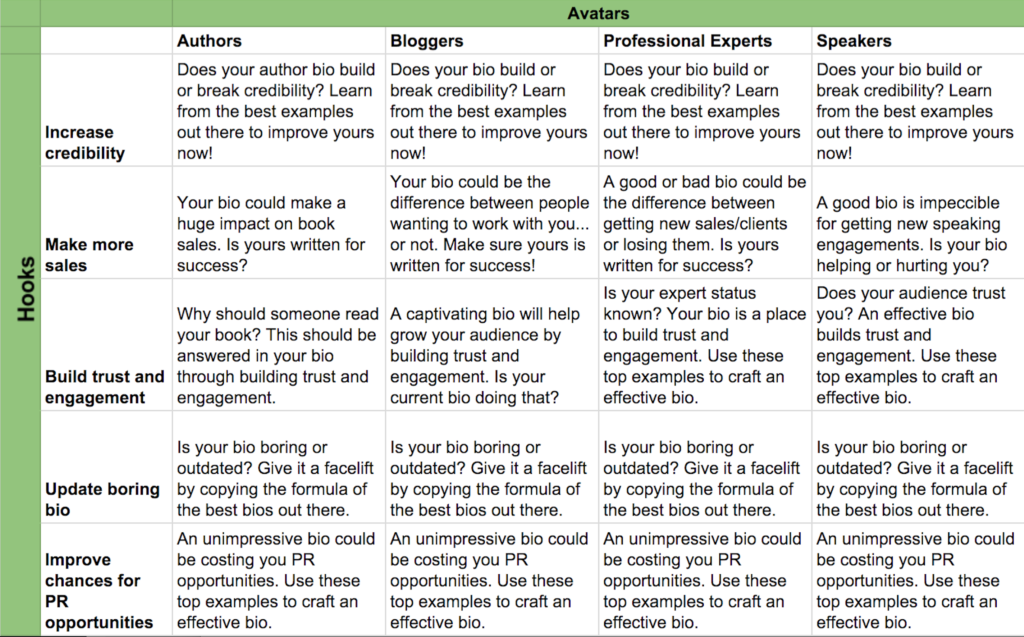
Step 3: Write the Copy
The copy may be very similar for each hook, but the grid forces you to think about how you should talk to each avatar separately. You might talk to a blogger differently than you would to a professional speaker.
Step 4: Research the Avatars
Ask these questions:
- What events do they attend?
- What books, blogs, or magazines do they read?
- What tools do they use?
Researching these questions in the form of “top blogger tools” or “top blogger conferences” is a good place to start to gather ideas on how to target your avatars when you set up the ads.
Step 5: Create the Ad Images
At minimum, you want to make at least one image for each hook. If you want to test images, you can make more than one. If you have the resources and want to get really crazy, you can make 1 (or more) different image for each cell.
Whether you have these designed in-house or outsource them, make sure to provide a detailed description of what you want for each image. Also provide direction on how you want the files saved, so it will be easier to create your ads in the next step.
If you’re outsourcing, a good option to try out is Design Pickle. You get an unlimited amount of graphic design done at a monthly rate. If you commit to this system and have a lot of images designed, it’s an incredible value.
Step 6: Run the Ads
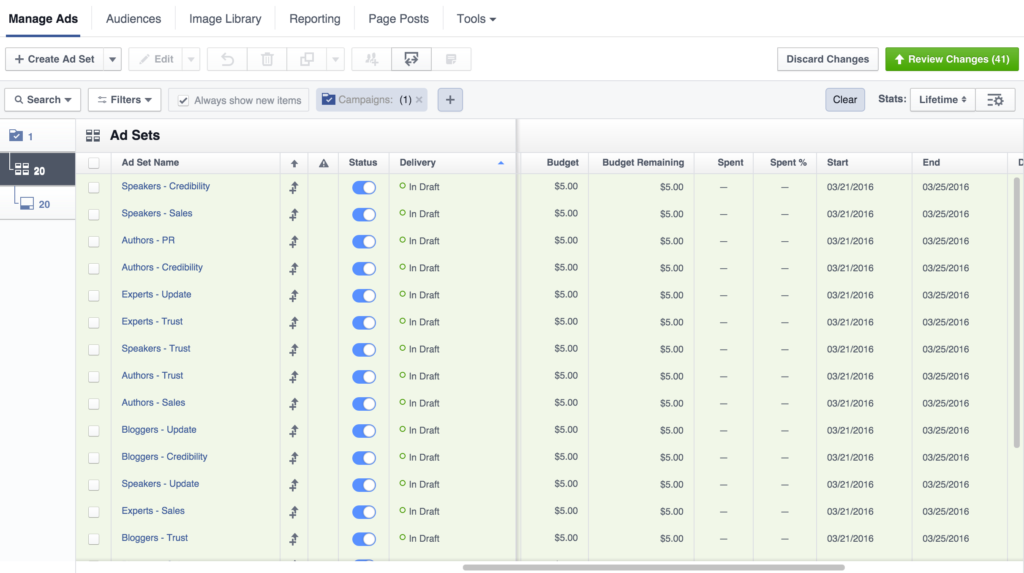
You now have all the pieces of the puzzle to set up your new campaign. Depending on which ad platform you’re running ads on, you may be able to easily import all the ads at once which will save you a lot of time.
I’m running my campaign on Facebook, so I can bulk import the ads into power editor. Make sure all the ads have the same budget and run for the same amount of time to get proper results. I have each ad set spending $5 a day for five days for a total test budget of $500.
Step 7: Measure results
Once ads have run long enough to pull results, record the cost per acquisition (CPA) for each avatar and hook combo. You’ll now be able to identify which avatars and hooks are performing the best. You can then scale up the winners, and stop running the losers.
And there you have it. A simple process that you can put in place to standardize your paid ads process. Have you tested this strategy yet?
Leave a comment below with your findings.